#Insert using jquery
Explore tagged Tumblr posts
Visit Tumblr Blog
Explore Tumblr blogs with no restrictions, modern design and the best experience.
Last Seen Tumblr Blogs


Fun Fact
69% of Tumblr users are millennials.
Text
How to Add JavaScript to WordPress: A Simple Guide for Beginners
JavaScript is a powerful scripting language meant for bringing life into WordPress websites. JavaScript takes away all the staticness from your site and turns it into an interesting user experience with interactive forms, content that updates dynamically, and smooth animations. The newbie in WordPress finds it quite confusing as a matter of fact: how, really, does one typically add JavaScript to a WordPress site?

Worry not- including JavaScript in WordPress is far from the daunting task one might think. In this very guide, we present several easy methods to include JavaScript on your site, some best practices to keep the exercise smooth, and a few tips on avoiding common pitfalls.
Why Add JavaScript to Your WordPress Site?
Before diving in, here is a quick review of the importance of adding JavaScript:
Enhances User Experience: Makes the website interactive and engaging.
Dynamic Content: Updates content without loading the page.
Form Validation: Validates forms and instantly gives feedback.
Animations: Adds sliders, fades, or even hover effects.
Third-party Tools: JavaScript is required by many third-party services such as chatbots or tracking software.
Now that you know why it’s beneficial, let’s see how you can add it to your WordPress site.
Method 1: Using the Theme Customizer (Small Scripts)
If your script is just one small snippet (say, a tracking code), then the WordPress customizer can be used.
+ Step 1: Go to Your WordPress Dashboard
Log in and navigate to Appearance > Customize.
+ Step 2: Find Additional CSS/JS or Additional Code
Some themes and plugins offer the ability to add small code snippets (labeled Custom JavaScript or something to that effect).
+ Step 3: Enter Your Script
Paste the JavaScript code between the <script></script> tags.
+ Step 4: Publish
Click Publish to make the changes live.
Example:
<script>
console.log("Hello, this is my custom JS!");
</script>
Note: This method works great for short snippets, but anything bigger will require the use of a child theme or plugin.
Method 2: Using the “Header and Footer” Plugin (Easiest for Non-Coders)
For the average user, installing this plugin is probably the easiest method.
Installation of Plugin
Navigate to Plugins > Add New and search for “Insert Headers and Footers.” Install and activate it.
Access to the Plugin
Navigate to Settings > Insert Headers and Footers.
Provide Your JavaScript
Insert your JavaScript code in the appropriate box (Header, Body, or Footer).
Save
Save, and you're done!
Advantages of this method:
- No editing is done in the theme files.
- Compatible with most themes.
- Safe and plugin-managed.
Method 3: Adding JS to a Child Theme (For More Control)
If you’re comfortable with a bit of coding, using the child theme is a serious way to introduce JavaScript.
Why would one want to use a child theme?
Because editing those core theme files directly can cause your site to break during a theme update. The child theme keeps your modifications out of harm’s way.
The steps are:
Create a Child Theme
If you haven't yet, create a child theme with a style.css file and a functions.php file.
Enqueue JavaScript
Open your child theme's functions.php and insert this code to enqueue your JavaScript file:
function my_custom_scripts() {
wp_enqueue_script('my-custom-js', get_stylesheet_directory_uri() . '/js/custom.js', array('jquery'), null, true);
}
add_action('wp_enqueue_scripts', 'my_custom_scripts');
What it does:
- tells WP to load your JavaScript file custom.js;
- and, of course, this file should lie in the /js/ folder inside your child theme.
Create the JavaScript File
Create a new file named custom.js in the /js/ folder inside your child theme.
Write Your JavaScript
Put in your code in custom.js.
document.addEventListener("DOMContentLoaded", function() {
console.log("Custom JavaScript loaded!");
Clear Cache
Clear your browser and site cache to see the changes.
Method 4: Through WordPress Block Editor (Individual Posts/Pages)
If you want the JavaScript only on a very particular page or post, you can add the code to it right in the Block Editor (Gutenberg).
Edit Your Page/Post
Open the page or post inside the editor.
Add a “Custom HTML” Block
Search for a block named "Custom HTML" and insert that.
Add Your Script
Paste the script inside the block.
<script>
alert("Hello! This is a page-specific script.");
</script>
Preview and Publish
Preview it to test and publish!
Best Practices for Adding JavaScript to WordPress
Enqueue Scripts Properly
Make use of wp_enqueue_script() instead of manually editing header.php or footer.php so that compatibility is ensured.
Avoid Inline Scripts for Large Code
Large inline scripts tend to slow down a website. Instead, keep the JavaScript in external files.
Use a Child Theme
Never keep directly editing the parent theme so that your changes don't get wiped out upon update.
Minify and Combine
Consider minifying JavaScript files and combining them for better performance (using plugins like Autoptimize).
Test Before Publishing
Tests should always be done for your JavaScript in a staging environment prior to pushing it to a live site.

Troubleshooting Common Issues
Script Not Loading?
Check to see if the file paths are indeed correct and if all caches have been cleared.
JavaScript Errors?
Look into your browser's console for any errors; trace those errors back and resolve them.
Plugin Conflicts?
Plugins might sometimes load conflicting scripts. Disable the plugins one at a time to find the culprits.
Adding JavaScript to the WordPress site is a complete game-changer in the high-level interactions and engagements of users. The path may be simple if you are using a simple plugin, editing a child theme, or injecting snippets into the editor. Key Takeaways for You:
• Plugins like Insert Headers and footers should be used for quick and easy jobs.
• Use a child theme and enqueue scripts for more involved use.
• Lastly, try to test always and follow the best performance and security practices.
This guide can help you kick-start some dynamic and interactive stuff for your WordPress site! Looking to make the switch? Talk to a Digital Marketing Company in Chandigarh that knows exactly how to take you from the street corner to the top of Google.
0 notes
Text
Buzzy Bundle Nulled Script 4.9.0

Buzzy Bundle Nulled Script – Your Ultimate Viral Media Powerhouse In today’s fast-paced digital world, captivating content is king. If you're looking to create a highly engaging, buzzworthy platform without breaking the bank, the Buzzy Bundle Nulled Script is your go-to solution. This powerful script brings together multiple content types—news, viral media, quizzes, polls, and more—into one dynamic platform, all available for free from our site. What is Buzzy Bundle Nulled Script? The Buzzy Bundle Nulled Script is an all-in-one viral media platform that allows you to build a highly interactive website where users can explore and share trending content. From meme generators to interactive polls and personality quizzes, Buzzy offers everything you need to build a community-driven site with viral potential. This nulled version unlocks all premium features without limitations, so you can harness the full power of the script without spending a dime. Whether you're a content creator, digital marketer, or aspiring media mogul, this script makes launching a buzz-worthy site effortless. Technical Specifications Script Type: PHP Laravel Framework Database: MySQL Frontend: Bootstrap 4, jQuery CMS System: Built-in admin panel for easy content and user management Content Types Supported: Quizzes, Polls, Videos, Articles, Lists, Galleries Ads & Monetization: Google AdSense integration, native ad support Top Features and Benefits Multi-Content Support: Post viral articles, GIFs, videos, trivia quizzes, personality tests, and much more. SEO-Ready: Fully optimized for search engines to help your content rank and attract organic traffic. Responsive Design: Seamlessly adapts to mobile devices, ensuring a smooth user experience across all platforms. Built-in Monetization: Easily insert ads into content sections and maximize revenue through various ad networks. Engagement Tools: Social sharing buttons, reaction systems, comments, and leaderboards to boost user interaction. Advanced Admin Panel: Manage users, posts, categories, menus, and site settings with ease. Ideal Use Cases The Buzzy Bundle Nulled Script is perfect for creators who want to build a viral media empire or niche content hub. It’s ideally suited for: Viral news websites targeting entertainment and pop culture Buzzfeed-style quiz platforms to drive social engagement Community-driven meme hubs or funny content pages Digital publishers looking for traffic-based monetization strategies Installation Guide Launching your viral media site with the Buzzy Bundle Nulled Script is straightforward. Here's how: Download the script package from our website. Upload it to your hosting server using cPanel or FTP. Create a new MySQL database and configure the database details in the .env file. Run the installer by accessing your site’s URL and follow the on-screen steps. Log in to the admin dashboard, configure your site settings, and start publishing viral content! The script comes with complete documentation, making it easy for both beginners and developers to set up and customize. Why Choose Buzzy Bundle Nulled Script? When you download the Buzzy Bundle Nulled Script from our site, you're choosing a platform that’s not only packed with features but also completely free. No licensing fees, no limitations—just pure viral media power in your hands. Unlike other costly solutions, this script empowers you to build and grow your brand with zero financial obstacles. Its built-in SEO features and audience engagement tools make it easy to attract visitors, keep them engaged, and monetize effectively. FAQs Is the Buzzy Bundle Nulled Script safe to use? Yes. The version available on our website is fully tested, clean, and safe to deploy on live servers. Can I use this script for commercial projects? Absolutely! With the nulled version, you're free to use it for any type of commercial or personal project. Does it come with updates? We update our nulled scripts regularly to include the latest features and security patches.
Always check our website for the newest version. Is technical support included? While official support is not available for nulled versions, our community forums and setup guides are a great place to find help. Get Started Today Why wait to go viral? Download the Buzzy Bundle Nulled Script today and take the first step toward launching your own dynamic, content-rich media platform. With no costs, no subscriptions, and unlimited potential, it’s the perfect tool to turn your content dreams into reality. Looking for more premium tools and scripts? Visit nulled club for more free resources. Want to enhance your WordPress site with a top-tier design? Get Porto NULLED for free and give your site a stunning professional look.
0 notes
Text
Top 20 Web Designing Interview Questions & Answers
Web designing is one of the most sought-after professions across various industries. This dynamic field evolves continuously with advancements in technology. To build a successful career in web designing, mastering the basics is essential. A comprehensive web designing course typically covers fundamental concepts like the box model, color theory, typography, positioning, and much more. Below, you'll find a collection of essential web designing interview questions and answers to help you excel in your career journey.
Web Designing Interview Questions & Answers
Which languages and platforms are most commonly used in website design?
Web designing can be learnt from the scratch
CSS and HTML basic learning
Web designing on trend and development
Web development debugging design inside
Create website portfolio
This course is ideal for both beginners and individuals with limited knowledge of web design. It opens up greater opportunities for web developers and those who are pursuing or aspiring to pursue careers as graphic designers.
Web design and development involve various languages, but JavaScript and Java are among the most prominent, with Python also playing a significant role.
These languages are versatile and can handle various tasks, such as controlling browsers, editing content, executing client-side scripts to interact with users, and enabling asynchronous communication.
What is HTML?
Hypertext Markup Language (HTML) is the standard tool for creating documents that can be displayed in a web browser. It structures documents by defining structural semantics to format text elements such as headings, lists, links, paragraphs, quotes, and more.
Here are the most commonly used tags in HTML:
HTML tag which is considered to be the the basic or the foundation of the HTML document
Head tag which has all kinds of head elements like title, style, meta in the HTML file
Body tag defines the HTML document body contains image, lists, tables
Title tag which defines the HTML document title
Empty or non container tags
Tables tags
Inputs tag, form tag, submit input tag, drop down option tag
What role does CSS play in web design?
CSS is used for the presentation of web pages, including elements like colors, layout, and fonts. It enables the presentation to adapt to various devices, such as screens, printers, or smaller screens. CSS is an independent language from HTML and is often used in XML-based markup languages.
What is an external stylesheet, and how is it linked?
An external stylesheet is a separate file linked to an HTML web page. It typically has a .CSS file extension and contains all the styles used throughout the website. This method is a valuable tool for webmasters, as it allows for centralized management of styles across multiple pages.
6. Explain how can you integrate CSS file to your webpage?
There are three ways to set CSS into the web pages
The external file should be linked into the webpage which can be done with the input method of old browsers like Netscape 4.0
Create the CSS block in the web page which typically gets most at the webpage top this happens in between the the head and head tax
Embed or insert the right CSS code with the tag itself
7. How do you differentiate between HTML tags and elements?
An HTML element refers to a fundamental component of a document. It consists of a start tag and an end tag, with the content placed between them, conveying the meaning of the element.
An HTML tag is used to define the beginning or end of an element. The terms "tag" and "element" are often used interchangeably, meaning an element is essentially a tag, and vice versa.
8. Here are some commonly used jQuery functions for webpage design:
This application is highly efficient, offering numerous functions that streamline tasks and accelerate processes. The framework plays a crucial role in building JavaScript, making development faster and more effective.
It can be used in local installation to include in the HTML cord.
Cdn best version can be included in the jQuery library.
Helps in developing ajax based applications.
Create quotes simple, reusable and precise.
The process gets simplified because of the html.com traverse.
Helps in handling events create animation with ajax support.
9. How can you set an image as a fixed background?
To fix or position a background image, CSS is essential. The background property in CSS is used to define background settings, and it allows for customization of the image placement. CSS2 provides functionality to fix the background, while CSS3 introduces values that enable fixing the background within a containing block.
10. What is an external stylesheet?
An external stylesheet is a separate file with a .CSS extension that contains all the CSS definitions for an HTML page. It is typically named something like "styles.css" and holds all the necessary styles for the HTML document.
11. What is doctype?
The DOCTYPE declaration is an instruction that associates a document with a specific SGML (Standard Generalized Markup Language) document type for XML. It is part of the document and defines the markup language in a concise string, ensuring it adheres to a specific syntax.
12. Explain the difference between Standard Mode and Quirks Mode.
In Quirks Mode, the page design behaves like non-standard rendering, a feature that originated with early versions of Microsoft Internet Explorer and Netscape Navigator.
In contrast, Standard Mode follows the HTML and CSS specifications for proper design behavior. Standard Mode is the preferred mode, as it adheres to the latest web standards, unlike the older Quirks Mode.
13. How would you scale route in Mobile Screens?
Online business transactions via mobile devices continue to grow each year, making mobile optimization increasingly important. This trend encourages companies to focus on creating websites and e-commerce platforms tailored for mobile users. The primary reasons for this shift include the diverse behaviors across different platforms, which drive the need for efficient website development and enhancement.
Web pages have different parameters like header, footer, main content, forms, videos images, tables, the screen dimensions in the devices, changing screen solutions to determine the pixel density and also work accordingly on the operating system.
These kinds of changes highly focus to the enhanced performance of the devices. It is mandatory that the sides have to be according to the adaptation of different devices, so the mobile first approach should be taken and produced matching the features.
14. When should you use the CSS float property?
The CSS float property is used to position an element to the left or right of its container, allowing text and inline elements to wrap around it. It is commonly used when you want to align an image and have text flow around it.
15. How do you insert comments into HTML code without text being picked up?
HTML commands are using different quotes in the browser the comment starts with “<*!—and end with”-->”
16. How many HTML tags are typically used for a basic web page design?
The number of HTML tags used for a web page depends on the specific design and functionality required. Below are some common tags that can be used to create a basic webpage.
IMG
Paragraph
DIV
SPAN
OL and UL
Anchor tag
Button
Input
Select
17. What do you mean by the prompt box?
The method called prompt exhibits the dialogue box which allows the visitor for inputs. It is used whenever the user wants to provide value before getting inside the page. This also returns the input value once the user tries to click the option “ok”.
18. Is CSS case sensitive?
The entire style sheets of CSS are case insensitive where certain parts are completely not under the CSS control. The HTML attributes like “id” and “class” are case sensitivity which comes under the category of font names and URIs. They are out of the specifications.
19. What are the elements that have been disappeared?
During the page creation many have noticed the disappearance of elements like the text, colour, text visibility, block visibility, block size, block position, font size and overlay.
20. For what purpose NaN functioning used?
This is a library function which gets the NaN value determining whether it actually a number or not. NaN expansion is not a number it comes back if it’s not true. If it is cancelled then it returns as null.
0 notes
Text

How Do You Implement Data Validation and Error Handling for Your Web Application’s Database Input and Output?
Introduction
In today’s digital economy, businesses rely largely on web applications for client interactions, data management, and day-to-day operations. A web application‘s effectiveness is measured by its functionality and ability to manage data accurately and avoid errors that interrupt corporate processes. Data validation and error management for database input and output are critical to ensuring reliability.
Data validation guarantees that the information entered into your database satisfies the necessary criteria, preventing invalid or damaging data from entering the system. On the other side, error handling focuses on providing tools to deal with difficulties that may arise during database operations, ensuring that the program recovers gracefully.
In this article, we’ll look at how organizations may employ good data validation and error handling in web applications to streamline processes, prevent data corruption, and improve the user experience. We’ll also look at how 8 Tech Labs, a prominent mobile app development firm, can help organizations achieve these goals with competent services.
The Importance of Data Validation and Error Handling
Effective data validation and error handling are vital for any web application that interacts with databases. Without these mechanisms in place, applications are vulnerable to:
Data corruption: Invalid data may lead to inaccurate analytics and faulty business decisions.
Security breaches: Insufficient validation can leave your application exposed to threats like SQL injection.
User frustration: Poor error handling can result in a negative user experience, reducing user satisfaction and retention.
Operational inefficiencies: Uncontrolled errors may cause downtime, affecting business continuity and leading to financial losses.
By ensuring that data is properly validated and errors are managed effectively, businesses can avoid these pitfalls, ensuring smoother operations and better user experiences. The process can also improve the overall integrity of your mobile app development and app development software, ensuring both front-end and back-end work seamlessly.
How to Implement Data Validation in Your Web Application
Implementing data validation for web application input and output is a critical task to ensure that the data entered is accurate, complete, and formatted correctly. There are several ways to implement data validation, and a combination of client-side and server-side validation is often the best approach.
1. Client-Side Validation
Client-side validation is the first line of defence and happens before the data is sent to the server. This can help catch common issues early on and improve user experience by providing instant feedback.
HTML5 Form Validation: Utilize built-in HTML5 input types such as email, number, url, and tel to ensure the input is formatted correctly.
JavaScript Validation: Use JavaScript or popular libraries (like jQuery) to add custom validation rules. This can include checking if the fields are empty, verifying email formats, or matching passwords.
Example:
document.getElementById(“submit”).addEventListener(“click”, function(event){
if(document.getElementById(“email”).value == “”){
alert(“Email is required!”);
event.preventDefault();
}
});
2. Server-Side Validation
Although client-side validation is useful for immediate feedback, it’s essential to validate data on the server side as well. Server-side validation ensures that data is checked before it is inserted into the database, preventing issues such as SQL injections or data inconsistency.
Check for Null or Empty Fields: Ensure that all required fields are provided.
Data Type Validation: Confirm that the data matches the expected data type (e.g., a date field contains a valid date).
Sanitize Inputs: Remove any special characters that may pose a security risk (e.g., SQL injection attacks).
Example (PHP):
if (empty($_POST[“email”])) {
echo “Email is required”;
} else {
$email = filter_var($_POST[“email”], FILTER_SANITIZE_EMAIL);
}
3. Regular Expressions
For more complex validation (like validating phone numbers or addresses), regular expressions are often used to match input against predefined patterns. Regular expressions ensure that data conforms to specific formats.
Best Practices for Error Handling
Error handling is just as crucial as data validation in developing a dependable web application. Here’s how firms can apply efficient error management strategies:
1. Error Logging
Keep track of errors that occur throughout your online application. These logs should include detailed information like the problem message, the user’s actions when the error occurred, and the data involved. Logs allow developers to swiftly detect and resolve issues before they affect users.
2. Graceful Degradation
In the event of a problem, offer users with clear, actionable messages rather than allowing the application to crash or display cryptic technical warnings. Graceful degradation enhances the user experience by advising them of the problem without crashing the program completely.
For example, instead of the general “500 Server Error,” the program may display “We’re having some problems right now.” “Please try again later.” This decreases user irritation while maintaining trust.
3. Custom Error Pages
Create unique error pages that match your application’s look and direct users on what to do next. For example, if a user receives a 404 error, display a page with advice on how to go to the correct content.
4. Testing and Monitoring
Regularly test your error-handling procedures by simulating various types of errors and ensuring that they are handled correctly. Implementing error-tracking software (such as Sentry or Bugsnag) can help to automate this procedure.
How 8 Tech Labs Can Help
At 8 Tech Labs, we understand the importance of building robust web applications that are both reliable and secure. Our mobile app development and app development services are tailored to meet the specific needs of businesses, ensuring that data validation and error handling are implemented effectively to maximize performance and security.
IT Strategy Development: We work with businesses to create long-term strategies that leverage cutting-edge technologies for optimal growth.
Technology Solutions: Our team provides comprehensive IT solutions that streamline operations and integrate seamlessly with existing workflows.
Digital Transformation Consulting: We guide businesses through digital transformation, ensuring that web applications, mobile apps, and other technologies align with industry best practices.
IT Advisory Services: We offer expert advice on selecting the right technologies and approaches for your web applications, ensuring smooth functionality and user satisfaction.
With 8 Tech Labs’ expertise, you can ensure that your web application remains secure, reliable, and efficient, driving both immediate and long-term growth.
Read More
#8 Tech Labs#custom software development#custom software development agency#custom software development company#software development company#software developers near me#mobile app development software#bespoke software development company#bespoke software development#software development firms#software development agency#nearshore development#software engineer companies#software development services#nearshore software development company#healthcare software development companies#application development companies#qda software#develop mobile app#software development#nearshore software development#web app development
0 notes
Text
jQuery Dependent DropDown List – States and Districts Using PHP-PDO

In this tutorial, we are going to learn how to change the district dropdown list option based on the selected state name using PHP-PDO.
In this example, we have two dropdowns for listing states and districts. On changing states drop-down values, the corresponding district dropdown values will be loaded dynamically using jQuery AJAX.
Click: https://phpgurukul.com/jquery-dependent-dropdown-list-states-and-districts-using-php-pdo/
File structure for this tutorial
config.php — Database connection file.
index.php — Main file having drop down
get_district.php — used to retrieve the district based on the selected state name.
MySQL Database structure for this tutorial
In this tutorial two MySQL Database table is used.
state
district
state table structure
CREATE TABLE `state` (
`StCode` int(11) NOT NULL,
`StateName` varchar(150) DEFAULT NULL
) ENGINE=MyISAM DEFAULT CHARSET=latin1;
district table structure
CREATE TABLE `district` (
`DistCode` int(11) NOT NULL,
`StCode` int(11) DEFAULT NULL,
`DistrictName` varchar(200) DEFAULT NULL
) ENGINE=MyISAM DEFAULT CHARSET=latin1;
Step 1: Create a database connection file (config.php)
<?php
// DB credentials.
error_reporting(0);
define(‘DB_HOST’,’localhost’);
define(‘DB_USER’,’root’);
define(‘DB_PASS’,’’);
define(‘DB_NAME’,’demos’);
// Establish database connection.
try
{
$dbh = new PDO(“mysql:host=”.DB_HOST.”;dbname=”.DB_NAME,DB_USER, DB_PASS,array(PDO::MYSQL_ATTR_INIT_COMMAND => “SET NAMES ‘utf8’”));
}
catch (PDOException $e)
{
exit(“Error: “ . $e->getMessage());
}
?>
Step2: Create a HTML form with two fields . One is for state and another one is for district.
<form name=”insert” action=”” method=”post”>
<table width=”100%” height=”117" border=”0">
<tr>
<th width=”27%” height=”63" scope=”row”>Sate :</th>
<td width=”73%”><select onChange=”getdistrict(this.value);” name=”state” id=”state” class=”form-control” >
<option value=””>Select</option>
<! — — Fetching States — ->
<?php
$sql=”SELECT * FROM state”;
$stmt=$dbh->query($sql);
$stmt->setFetchMode(PDO::FETCH_ASSOC);
while($row =$stmt->fetch()) {
?>
<option value=”<?php echo $row[‘StCode’];?>”><?php echo $row[‘StateName’];?></option>
<?php }?>
</select></td>
</tr>
<tr>
<th scope=”row”>District :</th>
<td><select name=”district” id=”district-list” class=”form-control”>
<option value=””>Select</option>
</select></td>
</tr>
</table>
</form>
Step3: Getting States using jQuery AJAX
This script contains a function that will be called on changing state dropdown values. It will send AJAX request to a PHP page to get corresponding district dropdown options.
<script>
function getdistrict(val) {
$.ajax({
type: “POST”,
url: “get_district.php”,
data:’state_id=’+val,
success: function(data){
$(“#district-list”).html(data);
}
});
}
</script>
Step 4: Read the district table using PHP based on the selected state name.
This PHP code connects the database to retrieve district table values based on the state id passed by jQuery AJAX call.
<?php
require_once(“config.php”);
if(!empty($_POST[“state_id”]))
{
$stateid=$_POST[“state_id”];
$sql=$dbh->prepare(“SELECT * FROM district WHERE StCode=:stateid”);
$sql->execute(array(‘:stateid’ => $stateid));
?>
<option value=””>Select District</option>
<?php
while($row =$sql->fetch())
{
?>
<option value=”<?php echo $row[“DistrictName”]; ?>”><?php echo $row[“DistrictName”]; ?></option>
<?php
}
}
?>
How to run this script
1.Download the zip file
2.Extract the file and copy statedistdropdown-pdo folder
3.Paste inside root directory(for xampp xampp/htdocs, for wamp wamp/www, for lamp var/www/html)
4.Open PHPMyAdmin (http://localhost/phpmyadmin)
5.Create a database with name demos
6.Import regdb.sql file(given inside the zip package )
7.Run the script http://localhost/statedistdropdown-pdo
PHP Gurukul
Welcome to PHPGurukul. We are a web development team striving our best to provide you with an unusual experience with PHP. Some technologies never fade, and PHP is one of them. From the time it has been introduced, the demand for PHP Projects and PHP developers is growing since 1994. We are here to make your PHP journey more exciting and useful.
Website : https://phpgurukul.com
0 notes
Text
5 Udemy Paid Course for Free with Certification.(Limited Time for Enrollment)

1. HTML & CSS - Certification Course for Beginners
Learn the Foundations of HTML & CSS to Create Fully Customized, Mobile Responsive Web Pages
What you'll learn
The Structure of an HTML Page
Core HTML Tags
HTML Spacing
HTML Text Formatting & Decoration
HTML Lists (Ordered, Unordered)
HTML Image Insertion
HTML Embedding Videos
Absolute vs. Relative File Referencing
Link Creation, Anchor Tags, Tables
Table Background Images
Form Tags and Attributes - Buttons, Input Areas, Select Menus
Parts of a CSS Rule
CSS - Classes, Spans, Divisions
CSS Text Properties, Margins, & Padding
CSS Borders, Backgrounds, & Transparency
CSS Positioning - Relative, Absolute, Fixed, Float, Clear
CSS Z-Index, Styling Links, Tables
Responsive Web Page Design using CSS
Take This Course
👇👇👇👇👇👇👇
5 Udemy Paid Course for Free with Certification. (Limited Time for Enrollment)
2. Bootstrap & jQuery - Certification Course for Beginners
Learn to Create fully Animated, Interactive, Mobile Responsive Web Pages using Bootstrap & jQuery Library.
What you'll learn
How to create Mobile-Responsive web pages using the Bootstrap Grid System
How to create custom, drop-down navigation menus with animation
How to create collapse panels, accordion menus, pill menus and other types of UI elements
Working with Typography in Bootstrap for modern, stylish fonts
Working with Lists and Pagination to organize content
How to add events to page elements using jQuery
How to create animations in jQuery (Fade, Toggle, Slide, Animate, Hide-Show)
How to add and remove elements using Selectors (Id, Class)
How to use the Get Content function to retrieve Values and Attributes
How to use the jQuery Callback, and Chaining Function
Master the use of jQuery Animate with Multiple Params, Relative Values, and Queue Functionality
Take This Course
👇👇👇👇👇👇👇👇
5 Udemy Paid Course for Free with Certification.(Limited Time for Enrollment)
3. AWS Beginner to Intermediate: EC2, IAM, ELB, ASG, Route 53
AWS Accounts | Billing | IAM Admin | EC2 Config | Ubuntu | AWS Storage | EBS | EFS | AMI | Load Balancers | Route 53
What you'll learn
AWS Account Registration and Administration
Account Billing and Basic Security
AWS Identity and Access Management (IAM)
Creating IAM Users, Groups, Policies, and Roles
Deploying and Administering Amazon EC2 Instances
Creating Amazon Machine Images
Navigating the EC2 Instances Console
Working with Elastic IPs
Remote Instance Administration using Terminal and PuTTY
Exploring various AWS Storage Solutions (EBS, EFS)
Creating EBS Snapshots
Working with the EC2 Image Builder
Working with the Elastic File System (EFS)
Deploying Elastic Load Balancers (ELB)
Working with Auto Scaling Groups (ASG)
Dynamic Scaling using ELB + ASG
Creating Launch Templates
Configuring Hosted-Zones using Route 53
Take This Course
👇👇👇👇👇👇👇👇
5 Udemy Paid Course for Free with Certification.(Limited Time for Enrollment)
4. Google Analytics 4 (GA4) Certification. How to Pass the Exam
A Step-by-Step Guide to Passing the Google Analytics 4 (GA4) Certification Exam!
What you'll learn
Master key terms and concepts to effortlessly pass the Google Analytics 4 Certification Exam
Understand GA4 settings to optimize data flow to your site
Utilize the power of tags and events for effective data collection
Learn to track important metrics like events, conversions, LTV, etc. for operational decisions
Navigate GA4’s user-friendly interface to create and interpret impactful reports and analyses
Gain insider tips and sample questions to effortlessly pass the certification test
Take This Course
👇👇👇👇👇👇👇👇
5 Udemy Paid Course for Free with Certification.(Limited Time for Enrollment)
5. The Complete C & C++ Programming Course - Mastering C & C++
Complete C & C++ Programming Course basic to advanced
What you'll learn
Fundamentals of Programming
No outdated C++ Coding Style
Loops - while, do-while, for
The right way to code in C++
Gain confidence in C++ memory management
Take This Course
👇👇👇👇👇👇👇👇
5 Udemy Paid Course for Free with Certification.(Limited Time for Enrollment)
0 notes
Text
Single Sign-On(SSO) Code Using MVC C#
Single Sign-On(SSO) Code Using MVC C#

Hi I have written and developed this site so that students may learn computer science related technologies easily. I am committed to provide easy and in depth tutorials on various technologies. No one is perfect in this world and nothing is impossible. I give my best for you. I hope it will help you….Thanks
Codetriks is an educational website which is provide IT Tutorial .
In IT we provide Jquery,Mvc,c#.net,Asp.net,SQL,Zendesk,Dapper,Vue Js Tutorial for beginners so learn and increase your knowledge with us.
Codetriks provide IT tutorials – Codetriks | Jquery AJAX ,Jquery Basic,Jquery Selectors,Curd Operation using Jquery,Insert using jquery,Update using Jquery,Delete using jquery,Jquery grid,Jquery JTemplate,check uncheck checkbox using jquery,jquery onclick events,jquery Insert update delete code,jquery table ,jquery css,jquery foreach function,jquery tutorial,jquery sample demo,jquery examples Our website provide codes for every technology so please use this website. And also give me feedback how you feel.
Codetriks is a no 1 website for provide easy codes and build website very easy method. If you are a devloper then we also help you because we also provide, How to solve error and warnings so please use it and save your time and make money with us…
Thank you…
#Jquery AJAX#Jquery Basic#Jquery Selectors#Curd Operation using Jquery#Insert using jquery#Update using Jquery#Delete using jquery#jquery examples
0 notes
Link
5 notes
·
View notes
Photo

How to make a featured post using Tumblr API
As you probably already know, Tumblr doesn’t have the ability to have featured posts. Just imagine you have an important post that needs to be pinned on your blog that is dynamically updated with no efforts (no need to directly tweak your posts in your HTML editor, just tag the post with “featured” and it will automatically show up). You can see the example on my blog with the title named “latest posts”. In it, you can see four posts that are dynamically added if I tag them with a specific tag. Cool, isn’t? You can see the example here
Thus, I am here sharing my way on how to make it possible using jQuery and Tumblr API (I am sure there will another way to make this happen using vanilla JS, but since I am not good at this, I consider using jQuery instead). Hopefully, it will help you guys
Basically, Tumblr supports an API that retrieves published posts and it returns JSON-encoded object. If you have no idea what it means, try to put your blog URL on the browser and add /api/read/json after that and you will see a bunch of formatted code.
There are different methods to make this work. Register your application to get your API key or not. So what is the difference between them? Based on the Tumblr API documentation, each blog also has a unique identifier. The benefits of using a unique identifier instead of a hostname are that the unique identifier will not change if the blog name or custom domain changes. It can be used as a stable, persistent identifier for a blog.
But I prefer not using the method above as it is not suitable for those who are not familiar with registering an app. As I have mentioned above, you can extract the JSON of your blog by using your own URL such as fukuo.tumblr.com/api/read/json.
Part 1: Understanding the structure of JSON
The following code is used for retrieving all posts from a Tumblr blog using jQuery.getScript(). Please run this code somewhere on your code editor such as Brackets, Atom, VSCode etc. Replace yoururl with your own URL.
<script src="https://static.tumblr.com/5ojoydj/Kzyp56cvt/jquery-2.2.0.min.js"></script> <script> $(document).ready(function() { var readData; var url = "https://yoururl.tumblr.com/api/read/json"; $.getScript(url, function() { readData = tumblr_api_read; console.log(readData); }); }); </script>
If you press Ctrl + Shift + J (on Windows) or Ctrl + Option + J (on Mac) in your Google Chrome browser, it will open the developer console. It is a tool which logs the information associated with a web page, such as JavaScript, network requests, and security errors. For more information please read this article.

As you can see above, those are the structure that plays a big role for us. If you read this documentation on w3schools about JSON. It has its syntax rules:
Data is in name/value pairs
Data is separated by commas
Curly braces hold objects
Square brackets hold arrays
Please read that post for more information. By the way, let’s me explain the code I shared above and how it works:
var readData and var url is a variable
$.getScript() is a shorthand Ajax function to load something from the server using a GET HTTP request. In this case, we will load the url from the variable named
Inside the function, I have set the readData to read the data from JSON. If you, once again, put the https://fukuo.tumblr.com/api/read/json in your browser, you will see the beginning of the code that shows a variable named tumblr_api_read. I try to get all the data from this variable.
console.log has nothing to do with jQuery. It is a common object/method provided by debuggers (including the Chrome debugger and Firebug) that allow a script to log data (or objects in most cases) to the JavaScript console. I use this to see if the code is working or not by showing the data (see gifs above).
Part 2: Creating a div element to store the data and style them
I assume you have understood the basic of HTML and CSS. So here’s the code for you,
HTML: Please insert this code whatever you want, I recommend you to put this into the container of your posts
<div id="wrapper_featured_posts"> <h1>Featured Posts</h1> <div class="inner_featured_posts"> <!-- the posts will appear below using jQuery --> </div> </div>
CSS: Just put this code above </style> tag. You can edit the styling as much as you can!
#wrapper_featured_posts{max-width:1000px;margin:5rem auto;font-family:'Source Sans Pro',sans-serif;font-size:.9em}#wrapper_featured_posts .inner_featured_posts{display:grid;grid-template-columns:repeat(3,1fr);grid-gap:1.5rem}#wrapper_featured_posts .inner_featured_posts>.grid_featured{position:relative;width:auto;height:400px;overflow:hidden;background-color:#fff;border:1px solid rgba(0,0,0,.25)}#wrapper_featured_posts .inner_featured_posts>.grid_featured .body_caption{position:relative;padding:1em 1.5em}#wrapper_featured_posts .inner_featured_posts>.grid_featured h3{font-size:1.5em;padding:1em 1.2em;word-break:break-all;margin:0;background-color:#d43189}#wrapper_featured_posts .inner_featured_posts>.grid_featured h3 a{color:#fff}#wrapper_featured_posts .inner_featured_posts>.grid_featured a{color:#d43189}#wrapper_featured_posts .inner_featured_posts a.tumblr_blog{text-decoration:none;color:#d43189;font-weight:700;margin-bottom:-1.4em}#wrapper_featured_posts .inner_featured_posts>.grid_featured .body_caption blockquote{margin:0}#wrapper_featured_posts .inner_featured_posts>.grid_featured .body_caption h2{font-size:1.2em;margin:.4em 0 0}#wrapper_featured_posts .inner_featured_posts>.grid_featured:after{position:absolute;content:'';width:100%;height:100px;background:linear-gradient(0deg,#fff,rgba(255,255,255,.15));bottom:0;left:0}#wrapper_featured_posts .inner_featured_posts>.grid_featured .btnMore{position:absolute;bottom:20px;left:50%;transform:translateX(-50%);z-index:999;text-decoration:none;display:block;font-size:.85em;background-color:#2c1421;color:#fff!important;padding:.6em 1em;-webkit-border-radius:20px;-moz-border-radius:20px;-ms-border-radius:20px;-o-border-radius:20px;border-radius:20px}
Part 3: Retrieving posts with specific tags
Okay, we have previously got a simple code above to test whether the script is working or not and it works! But how do we make a script to retrieve the posts with a specific tag? The following code is a modified code, put this above </body> tag (please make sure you have included the jQuery library in your blog). Also, see the text I have highlighted below? If you tag your post as "featured", the post will show up. You can replace the tag with your own.
<script src="https://static.tumblr.com/5ojoydj/Kzyp56cvt/jquery-2.2.0.min.js"></script> <script> $(document).ready(function() { var readData, insert; var url = "https://{Name}.tumblr.com/api/read/json?&tagged=featured"; $.getScript(url, function() { readData = tumblr_api_read; console.log(readData); /*replace "2" with your desired number. please remember that the number starts from zero if you want to show 4 featured posts, replace "2" with "3" and so on. */ for (var i = 0; i <= 2; i++) { var posts = readData.posts[i]; /* is equivalent to tumblr_api_read.posts */ var link = posts["url"]; /* get an url of the posts */ /* photo posts */ var img = posts["photo-url-1280"]; /* get an image url */ var captionPhotos = posts["photo-caption"]; /* get a caption of the photo/photoset posts */ /* text posts */ var titleText = posts["regular-title"]; /* title of the posts */ var captionText = posts["regular-body"]; /* body of the posts */ /* condition if the post type is not photo/photoset posts */ if (img === undefined) { insert = '<div class="grid_featured">'; insert += '<h3><a href="' + link + '">' + titleText + '</a></h3>'; insert += '<div class="body_caption">' + captionText + '</div>'; insert += '<a class="btnMore" href="' + link + '">READ MORE</a>'; insert += '</div>'; $('h3').filter(function () { return $(this).text() == 'null'; }).remove(); $('.inner_featured_posts').append(insert); /* insert the HTML inside the <div class="featured_posts"></div> */ } else { insert = '<div class="grid_featured">'; insert += '<img src="' + img + '">'; insert += '<div class="body_caption">' + captionPhotos + '</div>'; insert += '<a class="btnMore" href="' + link + '">READ MORE</a>'; insert += '</div>'; $('.inner_featured_posts').append(insert); /* insert the HTML inside the <div class="featured_posts"></div> */ } } }); }); </script>
Explanation: If you see the code above, you must be wondering what posts[”url”] and posts[”photo-caption”] is for. Look at the following structure, they come from the arrays that are written inside square brackets. In my case, I use photo-caption and photo-url-1280 for my photo posts (image and caption)

The same thing to the screenshot below, I get the data from regular-body and regular-title to retrieve the title and the body of the text posts.

Unfortunately, this script only works for photo/photoset posts and text posts. I will try to update the code so that it will support any post type.
That’s all to it! Any form of credit, like and reblog are really appreciated! Thank you very much.
418 notes
·
View notes
Text
Why npm Is My Agency’s Package Manager of Choice to Help Us Grow Quickly
Guest post from npm customer and the founder of Rise, Kahl Orr.
I run Rise, a fast-growing web design and development agency based in Philadelphia. I started my company after my first job as a developer led to high demand for my services in the form of many satisfied customers, professional connections, and clients acquired through contracting.
Today, I manage a team of roughly 10 people, and we’re on track to double revenue year-over-year. We’re enjoying a growth spurt, and things are great.
However, things weren’t always this smooth. In fact, before adopting npm into our workflow, processes were more chaotic for us, which created downward pressure on our growth potential.
Here’s my journey of how I initially started my agency without npm and then successfully adopted it to help grow my business and revenue.
What Development Was Like Before npm
For starters, there was no real way to share dependencies with my team. We used to be in the habit of simply inserting any front-end tools and plugins into our codebase and even pushing code into our repository.
Part of the problem was how we were thinking of the tools we were using.
We initially didn’t give much consideration to what version of a specific tool we were using or what was really needed for our app or website to work, such as jQuery.
Let’s look at two, in-depth examples to illustrate what I mean.
We’ve developed two web apps for two different clients: Pet Stop and Home Care Assistance.
On both of those apps, there’s no use of front-end tooling or dependency management. As a result, we have to do a lot of manual work in figuring out what we need to make those websites work properly. In turn, this limited our approach to these websites.
If we had used npm from the start, we would have had the option to declare a list of technologies we wanted to use on the websites and then efficiently bring in the tools we need to manage said technologies.
Of course, hindsight is always 20/20…
The reality is that a lot of great tools exist, yet trying to download them and get them to work in conjunction with each other would’ve been next to impossible without npm since it ensures there are no conflicts between versions of tools.
Another less-than-ideal situation was that we always had to make other developers download these 3rd-party tools that were present in the project directory. Naturally, there’d always be a lot of unique folders and subfolders, which presented a considerable challenge when it came to downloading and extracting them all.
What we’ve discovered is that we’re not able to use modern, front-end workflows with our earlier apps that weren’t developed with npm.
The Opportunity to Use npm
We had the chance to see what npm could do when we started working on our largest project to date for our largest client. We figured this was as good a time as any to adopt npm into our workflows. From our past struggles with workflows, we came to realize that the tools for building a modern and maintainable website existed; we just had to finally take advantage of them.
It goes without saying that our behind-the-scenes work simply wouldn’t be possible without npm.
For instance, we use Git to keep track of our files and changes that were made. This lets team members work together seamlessly on the same website without overwriting one another and ensures we’re all working on the same, updated file.
To use this tool, we didn’t wish to store images or static-generated JavaScript and CSS files, which were generated from tools we took from npm, in our Git repository. Of course, there’s a need to have said JavaScript and CSS files to be live on the website.
Thanks to npm, we succeeded in locating a tool to run to build these files and then push them to a cloud server, where they’re stored.
On this project, we’ve been able to declare what kinds of tools are needed to develop upon, as well as what tools are required for the front end to run. Examples are a slider plugin and a small CSS library for the grid.
Working with npm has given way to immediate benefits, which include:
Being able to easily share what’s needed with the team
Installation with a simple command on the CLI
The ability to keep track of what we’re using, along with the specific version number (next to impossible without npm)
Everything is so efficient that there’s no need to commit any files that were installed through npm. The “npm install” command takes care of it automatically.
My Agency After npm Adoption
Today, we couldn’t imagine our development lives without npm. It has empowered us to become professionals at our craft. We like it so much that we’re determined to use npm in each project from here on out.
While my team is still new to npm, we’ve been adopting it into recent projects with more efficiency. For instance, on our latest project, all of our team members were set up with a website, which needs a lot of front-end tools, on their local environments. These front-end tools aren’t in our Git repository. In addition, the website needs a specific version of each tool.
Because of npm, when my team pulled these files from the Git repository, they only needed to run a specific command and presto! They immediately had all the right tools downloaded to the appropriate location, thus allowing them to smoothly work on the website. Overall, this is extremely useful, saves a lot of time, and promotes cohesion in our work.
---
Author Bio: "Kahl Orr is an entrepreneur, web developer, and the founder of Rise, a digital agency that specializes in web design. A fast-growing web development agency, Rise builds high-end, custom websites and web and mobile apps for national brands."
1 note
·
View note
Photo

hydralisk98′s web projects tracker:
Core principles=
Fail faster
‘Learn, Tweak, Make’ loop
This is meant to be a quick reference for tracking progress made over my various projects, organized by their “ultimate target” goal:
(START)
(Website)=
Install Firefox
Install Chrome
Install Microsoft newest browser
Install Lynx
Learn about contemporary web browsers
Install a very basic text editor
Install Notepad++
Install Nano
Install Powershell
Install Bash
Install Git
Learn HTML
Elements and attributes
Commenting (single line comment, multi-line comment)
Head (title, meta, charset, language, link, style, description, keywords, author, viewport, script, base, url-encode, )
Hyperlinks (local, external, link titles, relative filepaths, absolute filepaths)
Headings (h1-h6, horizontal rules)
Paragraphs (pre, line breaks)
Text formatting (bold, italic, deleted, inserted, subscript, superscript, marked)
Quotations (quote, blockquote, abbreviations, address, cite, bidirectional override)
Entities & symbols (&entity_name, &entity_number,  , useful HTML character entities, diacritical marks, mathematical symbols, greek letters, currency symbols, )
Id (bookmarks)
Classes (select elements, multiple classes, different tags can share same class, )
Blocks & Inlines (div, span)
Computercode (kbd, samp, code, var)
Lists (ordered, unordered, description lists, control list counting, nesting)
Tables (colspan, rowspan, caption, colgroup, thead, tbody, tfoot, th)
Images (src, alt, width, height, animated, link, map, area, usenmap, , picture, picture for format support)
old fashioned audio
old fashioned video
Iframes (URL src, name, target)
Forms (input types, action, method, GET, POST, name, fieldset, accept-charset, autocomplete, enctype, novalidate, target, form elements, input attributes)
URL encode (scheme, prefix, domain, port, path, filename, ascii-encodings)
Learn about oldest web browsers onwards
Learn early HTML versions (doctypes & permitted elements for each version)
Make a 90s-like web page compatible with as much early web formats as possible, earliest web browsers’ compatibility is best here
Learn how to teach HTML5 features to most if not all older browsers
Install Adobe XD
Register a account at Figma
Learn Adobe XD basics
Learn Figma basics
Install Microsoft’s VS Code
Install my Microsoft’s VS Code favorite extensions
Learn HTML5
Semantic elements
Layouts
Graphics (SVG, canvas)
Track
Audio
Video
Embed
APIs (geolocation, drag and drop, local storage, application cache, web workers, server-sent events, )
HTMLShiv for teaching older browsers HTML5
HTML5 style guide and coding conventions (doctype, clean tidy well-formed code, lower case element names, close all html elements, close empty html elements, quote attribute values, image attributes, space and equal signs, avoid long code lines, blank lines, indentation, keep html, keep head, keep body, meta data, viewport, comments, stylesheets, loading JS into html, accessing HTML elements with JS, use lowercase file names, file extensions, index/default)
Learn CSS
Selections
Colors
Fonts
Positioning
Box model
Grid
Flexbox
Custom properties
Transitions
Animate
Make a simple modern static site
Learn responsive design
Viewport
Media queries
Fluid widths
rem units over px
Mobile first
Learn SASS
Variables
Nesting
Conditionals
Functions
Learn about CSS frameworks
Learn Bootstrap
Learn Tailwind CSS
Learn JS
Fundamentals
Document Object Model / DOM
JavaScript Object Notation / JSON
Fetch API
Modern JS (ES6+)
Learn Git
Learn Browser Dev Tools
Learn your VS Code extensions
Learn Emmet
Learn NPM
Learn Yarn
Learn Axios
Learn Webpack
Learn Parcel
Learn basic deployment
Domain registration (Namecheap)
Managed hosting (InMotion, Hostgator, Bluehost)
Static hosting (Nertlify, Github Pages)
SSL certificate
FTP
SFTP
SSH
CLI
Make a fancy front end website about
Make a few Tumblr themes
===You are now a basic front end developer!
Learn about XML dialects
Learn XML
Learn about JS frameworks
Learn jQuery
Learn React
Contex API with Hooks
NEXT
Learn Vue.js
Vuex
NUXT
Learn Svelte
NUXT (Vue)
Learn Gatsby
Learn Gridsome
Learn Typescript
Make a epic front end website about
===You are now a front-end wizard!
Learn Node.js
Express
Nest.js
Koa
Learn Python
Django
Flask
Learn GoLang
Revel
Learn PHP
Laravel
Slim
Symfony
Learn Ruby
Ruby on Rails
Sinatra
Learn SQL
PostgreSQL
MySQL
Learn ORM
Learn ODM
Learn NoSQL
MongoDB
RethinkDB
CouchDB
Learn a cloud database
Firebase, Azure Cloud DB, AWS
Learn a lightweight & cache variant
Redis
SQLlite
NeDB
Learn GraphQL
Learn about CMSes
Learn Wordpress
Learn Drupal
Learn Keystone
Learn Enduro
Learn Contentful
Learn Sanity
Learn Jekyll
Learn about DevOps
Learn NGINX
Learn Apache
Learn Linode
Learn Heroku
Learn Azure
Learn Docker
Learn testing
Learn load balancing
===You are now a good full stack developer
Learn about mobile development
Learn Dart
Learn Flutter
Learn React Native
Learn Nativescript
Learn Ionic
Learn progressive web apps
Learn Electron
Learn JAMstack
Learn serverless architecture
Learn API-first design
Learn data science
Learn machine learning
Learn deep learning
Learn speech recognition
Learn web assembly
===You are now a epic full stack developer
Make a web browser
Make a web server
===You are now a legendary full stack developer
[...]
(Computer system)=
Learn to execute and test your code in a command line interface
Learn to use breakpoints and debuggers
Learn Bash
Learn fish
Learn Zsh
Learn Vim
Learn nano
Learn Notepad++
Learn VS Code
Learn Brackets
Learn Atom
Learn Geany
Learn Neovim
Learn Python
Learn Java?
Learn R
Learn Swift?
Learn Go-lang?
Learn Common Lisp
Learn Clojure (& ClojureScript)
Learn Scheme
Learn C++
Learn C
Learn B
Learn Mesa
Learn Brainfuck
Learn Assembly
Learn Machine Code
Learn how to manage I/O
Make a keypad
Make a keyboard
Make a mouse
Make a light pen
Make a small LCD display
Make a small LED display
Make a teleprinter terminal
Make a medium raster CRT display
Make a small vector CRT display
Make larger LED displays
Make a few CRT displays
Learn how to manage computer memory
Make datasettes
Make a datasette deck
Make floppy disks
Make a floppy drive
Learn how to control data
Learn binary base
Learn hexadecimal base
Learn octal base
Learn registers
Learn timing information
Learn assembly common mnemonics
Learn arithmetic operations
Learn logic operations (AND, OR, XOR, NOT, NAND, NOR, NXOR, IMPLY)
Learn masking
Learn assembly language basics
Learn stack construct’s operations
Learn calling conventions
Learn to use Application Binary Interface or ABI
Learn to make your own ABIs
Learn to use memory maps
Learn to make memory maps
Make a clock
Make a front panel
Make a calculator
Learn about existing instruction sets (Intel, ARM, RISC-V, PIC, AVR, SPARC, MIPS, Intersil 6120, Z80...)
Design a instruction set
Compose a assembler
Compose a disassembler
Compose a emulator
Write a B-derivative programming language (somewhat similar to C)
Write a IPL-derivative programming language (somewhat similar to Lisp and Scheme)
Write a general markup language (like GML, SGML, HTML, XML...)
Write a Turing tarpit (like Brainfuck)
Write a scripting language (like Bash)
Write a database system (like VisiCalc or SQL)
Write a CLI shell (basic operating system like Unix or CP/M)
Write a single-user GUI operating system (like Xerox Star’s Pilot)
Write a multi-user GUI operating system (like Linux)
Write various software utilities for my various OSes
Write various games for my various OSes
Write various niche applications for my various OSes
Implement a awesome model in very large scale integration, like the Commodore CBM-II
Implement a epic model in integrated circuits, like the DEC PDP-15
Implement a modest model in transistor-transistor logic, similar to the DEC PDP-12
Implement a simple model in diode-transistor logic, like the original DEC PDP-8
Implement a simpler model in later vacuum tubes, like the IBM 700 series
Implement simplest model in early vacuum tubes, like the EDSAC
[...]
(Conlang)=
Choose sounds
Choose phonotactics
[...]
(Animation ‘movie’)=
[...]
(Exploration top-down ’racing game’)=
[...]
(Video dictionary)=
[...]
(Grand strategy game)=
[...]
(Telex system)=
[...]
(Pen&paper tabletop game)=
[...]
(Search engine)=
[...]
(Microlearning system)=
[...]
(Alternate planet)=
[...]
(END)
4 notes
·
View notes
Text
Take a shot every time someone on Stack Overflow asks how to do something in jQuery and some jagoff answers with, "well actually, you don't need jQuery to do this, you can just use vanilla JavaScript instead: [insert example of code the person didn't ask for here]"
13 notes
·
View notes
Text
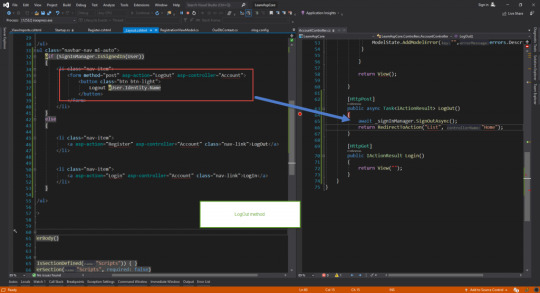
How to show Hide login and logout link on the basis of user login or not in asp.net core?
New Post has been published on https://is.gd/g8lXfN
How to show Hide login and logout link on the basis of user login or not in asp.net core?

Show Hide Login Logout Link on basis of user login or not
To perform login and logout we use the SignInManager class in asp .net core identity.
We have to add a logout functionality button in the layout view so we need to insert SignInManager instance into _Layout view by using dependency injection. To insert instance in layout or razor view we use @inject
@using Microsoft.AspNetCore.Identity @inject SignInManager<IdentityUser> SignInManager;
Need to add this _Layout view.

But we need to move using statement in a central file which is ViewImport file and we add this using statement in that, use of this is that minimize code duplication
Point to remember if you want to use any reference in view then you need to import or use using in that file.

To check the user is signed in or not use below code in view
SignInManager.IsSignedIn(User)
Code in Layout view
@inject SignInManager<IdentityUser> SignInManager; <!DOCTYPE html> <html> <head> <meta name="viewport" content="width=device-width" /> <title>@ViewBag.Title</title> <link href="~/lib/bootstrap/css/bootstrap.css" rel="stylesheet" /> <script src="~/lib/jquery/jquery.js"></script> <script src="~/lib/bootstrap/js/bootstrap.js"></script> </head> <body> <div class="container"> <nav class="navbar navbar-expand-lg navbar-dark bg-dark"> <button type="button" class="navbar-toggler" data-toggle="collapse" data-target="#menu"> <span class="navbar-toggler-icon"></span> </button> <div class="collapse navbar-collapse" id="menu"> <ul class="navbar-nav"> <li class="nav-item"> <a asp-action="list" asp-controller="home" class="nav-link">List</a> </li> <li class="nav-item"> <a asp-action="Create" asp-controller="home" class="nav-link">Create</a> </li> </ul> <ul class="navbar-nav ml-auto"> @if (SignInManager.IsSignedIn(User)) <li class="nav-item"> <form method="post" asp-action="LogOut" asp-controller="Account"> <button class="btn btn-light"> Logout @User.Identity.Name </button> </form> </li> else <li class="nav-item"> <a asp-action="Register" asp-controller="Account" class="nav-link">LogOut</a> </li> <li class="nav-item"> <a asp-action="Login" asp-controller="Account" class="nav-link">LogIn</a> </li> </ul> </div> </nav> <div > @RenderBody() </div> <div> @if (IsSectionDefined("Scripts")) @RenderSection("Scripts", required: false) </div> </div> </body> </html>
Below is the code for call logout, login, register method in _Layoutview
<li class="nav-item"> <a asp-action="Register" asp-controller="Account" class="nav-link">LogOut</a> </li> <li class="nav-item"> <a asp-action="Login" asp-controller="Account" class="nav-link">LogIn</a> </li>
1 note
·
View note
Note
could you help me? how to do the callback function for npf photosets? i'm using infinite scroll but i'm not getting it
hello! i haven’t used infinite scroll scripts in years and they’ve changed a lot since, so i had to pick up some reference. shythemes’ tutorial for using PXU photosets(the popular photosets script) with this particular infinite scroll script was very useful since most people seem to use this script and i got it running in a test blog!
first, follow the instructions already on the npf photosets’ post for when you’d like to “call the function again for newly inserted posts”, which is essentially what the infinite scroll script does—insert new posts from the next page into your current page. you’d be left with this:
var npfOptions = { rowClass:"npf_row", imageContainerClass:"tmblr-full", generatedPhotosetContainerClass:"npf_photoset", imageClass:"npf_image", includeSingleRowImagesInPhotosets: true, insertGalleryIndicator: false, galleryIndicatorClass: "npf_gallery_indicator", galleryIndicatorContent: "<img src='image_url'>", photosetMargins:"" }<br /> npfPhotosets("postSelector", npfOptions);
all of this is going at the bottom of your page, before the closing tag. now to pretty much copy-paste what shythemes has already nicely put, you’ll be adding only the function call(which is npfPhotosets("postSelector", npfOptions) instead of having to copy-paste the same options again) to the infinite scroll callback. at the end, you’ll have this:
var npfOptions = { rowClass:"npf_row", imageContainerClass:"tmblr-full", generatedPhotosetContainerClass:"npf_photoset", imageClass:"npf_image", includeSingleRowImagesInPhotosets: true, insertGalleryIndicator: false, galleryIndicatorClass: "npf_gallery_indicator", galleryIndicatorContent: "<img src='image_url'>", photosetMargins:"" }<br /> npfPhotosets("postSelector", npfOptions);<br /> $container.infinitescroll({ // infinite scroll stuff }, function(newElements) { // scripts you want to run on the new posts go inside here! npfPhotosets(newElements, npfOptions); });
there is a infinite scroll script tag there just as a reminder to include the infinite scroll source script. of course, don’t forget state what is the $container variable and since this infinite scroll script relies on jQuery, to add a jQuery library as well.
notice that the scripts you want to run on your posts should be run both outside and inside the infinite scroll callback, since the scripts inside the infinite scroll callback are only meant to be applied to the newly inserted elements. that’s why the function call shows up twice. the difference is the second function call uses simply newElements as its post selector, because newElements regards the posts inserted by the infinite scroll script.
obviously, all credits to shythemes!
2 notes
·
View notes
Note
hey! i just found your blog and your work is just incredible!!!! as someone who is trying to teach themselves how to code, i was hoping to get some advice from you. how did you learn to code so well? i'm sorry if you answered this question somewhere but i couldn't find anything. do you have any resources you would recommend? (also you said somewhere that you did math to move your tumblr controls. would you mind explaining that?) i'm sorry if this is too much of a bother, have a great day! :))
hello! thank you!!!
here’s a lil “anna’s coding journey” timeline:
2012: learned html/css from codecademy2013: learned jquery from codecademy2015: completed the general assembly tumblr theme tutorial2018: completed codecademy’s javascript course; took a c++ class at the local college — i will admit, taking that c++ class probably helped me improve the most, especially with javascript, but i know that such classes are not accessible to everyone.
but here’s the most important part that you can’t find on any timeline: practice. play around with code. see something you like? try it out yourself. find something interesting? see if you can recreate it! i made like 10 different themes and pages between 2015 and 2017 (that i’ve never published anywhere).
additionally, don’t be afraid to ask for help! i think one of my biggeset regrets regarding my learning-to-code is not asking questions, either when i got stuck or when i saw something cool and was curious. while figuring out everything myself definitely helped me learn code, it also slowed my improvement in ways. as a learner, i was afraid of being bothersome; as a theme maker, it brings me great delight helping someone figure something out. heck, i still ask questions.
the last piece of advice i can give is to reach out and talk to other coders and tag them in things! most theme makers i’ve encountered are open to messages and discussion, and tagging them in your codes helps them gain exposure. if you’d like, you can message or tag me, i track #annasthms.
here’s a non-exhaustive list of resources that i use:
official tumblr docs – while not the easiest to comprehend, it lists out and explains all most of tumblr’s variables
bychloethemes’s tumblr undocs – lists out the tumblr variables for unnested captions, and other goodies that the official docs don’t cover
w3schools/mozilla docs – gives explanations and examples about pretty much everything you would ever need to know about html/css/javascript etc.
stackoverflow – a coding forum where you can get your coding-related questions answered; make sure you’re not asking an already-asked question though, as people are taking time out of their day to answer questions and don’t appreciate repeated questions.
codrops/codepen – tutorials and coding playgrounds where people share their ideas; very useful to discover cool stuff to incorporate into your codes
caniuse – a website that tells you what browsers support [insert html/css element]
google fonts – a large collection of web fonts hosted by google
atom/brackets – free coding environments that you can download if you disagree with the tumblr editor
google – ask and you shall receive (an answer); a coder’s best friend
(x) (x) (x) – i’ve also got these three answers to similar questions bookmarked
oh! for that math, i simply calculated how far down the bottom of the sidebar was (sidebar offset + height) and moved the tumblr controls down that far. nothing complicated.
best of luck on your coding journey!
#this got really long oops#i love giving out advice and talking a lot can u tell#i hope this helps!#and is what you were looking for#if not ask again#coding help#ask#anna.txt#walldust
207 notes
·
View notes
Text
Jquery grid

Jquery grid
Hi I have written and developed this site so that students may learn computer science related technologies easily. I am committed to provide easy and in depth tutorials on various technologies. No one is perfect in this world and nothing is impossible. I give my best for you. I hope it will help you….Thanks
Codetriks is an educational website which is provide IT Tutorial .
In IT we provide Jquery grid Tutorial for beginners so learn Jquery grid and increase your knowledge with us.
Codetriks provide IT tutorials – Jquery AJAX ,Jquery Basic,Jquery Selectors,Curd Operation using Jquery,Insert using jquery,Update using Jquery,Delete using jquery,Jquery grid,Jquery JTemplate,check uncheck checkbox using jquery,jquery onclick events,jquery Insert update delete code,jquery table ,jquery css,jquery foreach function,jquery tutorial,jquery sample demo,jquery examples
Our website provide codes for every technology so please use this website. And also give me feedback how you feel.
Codetriks is a no 1 website for provide easy codes and build website very easy method. If you are a devloper then we also help you because we also provide, How to solve error and warnings so please use it and save your time and make money with us…
Thank you…
0 notes